MST Serpentine Belt Installation – Tension System Install
MST-Serpentine-Pulley-System-Installation-InstructionsRaw Text Instructions Below
MST Serpentine Belt Installation – Pulley Tensioner System Install
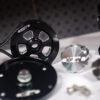
The following items have been included in your serpentine pulley kit:
1x Crank Pulley (6 ¾” Dia.)
1x Alternator/Generator Pulley (4 ¼” Dia.)
1x 4- Rib Belt (Master Pro # K040370)
1x Machined Aluminum Bracket Assembly w/ Sealed Idler Bearings (6203-2RS QTY 2)
4x 8mm Flat Washers
2x Stainless Steel Acorn Nuts and Flat Washers
***Latest Revision 9-4-2019 includes a bearing change to a 63032RS bearing (QTY 2) pressed into an aluminium sleeve*** >Replaces previous 5303ZZ Bearing<
Step 1:
Safety First!!! Turn Off Engine. It is also recommended that you disconnect the battery while working on your engine.
Step 2:
Remove existing belt, alternator/generator pulley and crank pulley from the engine. Also remove the front 2 nuts holding the stand down (these are the ones facing you). Be careful not to lose the 3mm and 8mm keys from the crankshaft and the generator shaft. Clean shafts and generator stand area where you removed old items to prepare for installation.
Step 3:
The Idler Bearing and Bracket has been pre-assembled for your convenience. For verification purposes, the bearing bolt has been tightened to the bracket (at or near 20 ft lbs of torque) and the at the jam nut is tight to the back of the bracket (minimal torque is acceptable here, ~ 15 ft lbs.). Please double check this step prior to installation. Jam nut should be tight!
Step 4:
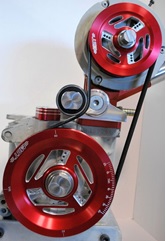
Facing the engine, place the Sub-Assembly described in Step 2 over the two studs and on top of the stand. There are (4) 8mm flat washers in your kits. These are here in the event there is a levelling issue. If you find that your aftermarket cast stand is tapers and causes the bracket assembly to sag or lean forward, place a washer over the stud (between the stand and bracket base) This should solve the problem. Loosen the flush head screw holding the aluminum components together and rotate the arm to the left. If this is not done prior to placing on the stand, the arm may not swivel past the alternator.Use the 12mm flat washers and acorn nuts to install the aluminum bracket assembly (See Figure 1.0). Do not fully tighten yet, there may be further alignment needed later.
Step 5: Serpentine Pulley Kit Installation
Install and securely tighten the crank pulley to the crankshaft, making sure to align the key slot. The pulley should slide on easily with a minimum of force. It may be necessary to tap the pulley into position using a rubber mallet, but if it requires too much force, remove the pulley and lightly sand the inside diameter of the pulley to help it slide easier. It is also recommended that you use a light oil or lubricant when installing the crank pulley.
Step 6:
Slide the generator pulley into position on the generator shaft following the same procedure as the crank pulley installation and make sure that it is all the way in. Use a straight edge (See Figure 2.0) and lay across the outer most faces of the crank pulley and generator pulley to check alignment of pulleys together. A maximum of (1mm) deviation in the alignment of the pulleys is recommended. Misalignment of the pulleys greater than 1mm may result in the belt tracking improperly and the unit may not function properly. It may be necessary to either add shims to one of the pulleys to improve alignment or to loosen the fan shroud assembly and shuttle forward or backward to assist in the alignment. Please refer to the vehicle engine manual for this step.
Step 7:
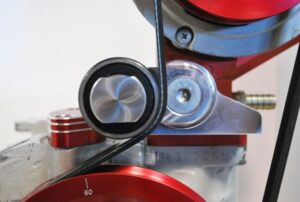
Once the pulleys align, tighten the generator pulley. Loosen the bolt holding the idler bearing adjustment bracket to the mounting bracket and install the belt. The belt should be around both pulleys and to the right side of the idler bearing. The belt and the idler sub-assembly should be floating freely at this point.
Step 8:
Tighten the two acorn nuts securing the bracket assembly to the stand to 20 ft lbs of torque. Rotate the idler bearing to place tension on the belt and using a hex key, tighten the flush head screw until the aluminum pieces with the trademarked knurled faces are secure to one another. Use Hex Key ONLY, do not use ratchets or power tools. This step does not require anything more than snug! (10-15 lbs of torque is more than sufficient, anything more and you may strip the threads in the bracket)
*****DO NOT OVER TENSION THE BELT!!
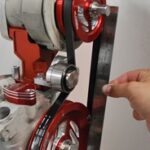
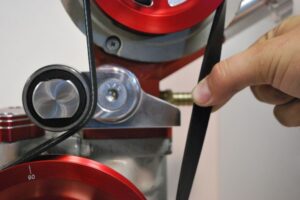
Too much tension on the belt can cause damage to your belt and/or generator shaft. Use the same amount of belt tension that you would normally require on any standard belt setup. (See Figure 3.0). Note: You should be able to easily twist the belt 90 degrees with two fingers. This also translates in to 3/8” to ½” side to side movement of the belt.
Step 9:
At this point, with everything aligned, tightened securely and you are ready for use. Clear all tools and possible obstructions out of your way, reconnect the battery and start the engine. If the belt begins to track out of the grooves and up the sidewall of the generator pulley, note the direction it is moving (to the front of the car; or to the back of the car) Shut off the engine!!! Follow Step 10 to correct the tracking problem. If the belt is tracking in the grooves properly, Step 9 is not a requirement.
Step 10:
Belt alignment and tracking. When the engine is running, the belt must track evenly through the generator pulley with the grooves aligned properly. If the belt is tracking improperly and moving up the sidewall of the pulley or beginning to fold; first check to make sure the faces of the pulleys are in line and then, if necessary, adjust the position of the idler bearing bracket assembly. Loosen the (2) Acorn nuts slightly and using a small pry bar changing the alignment of the bearing. Re-tighten the assembly, re-start the engine and repeat this step until the belt is tracking evenly and properly.
Revision 9-4-2019
***Careful and patient installation of this Serpentine Kit will give you many hours and many miles of outstanding performance. Please do not rush through the installation process. Missed or shortcut steps may cause personal injury or damage to your engine. Motorsports Tulsa, LLC, or any of its subsidiaries, owners or representatives are not responsible for damage or personal injury caused by improper or careless installation.
Thank you for your business and please, Enjoy Your New MST Serpentine Belt System Installation
Follow us on Socials:

