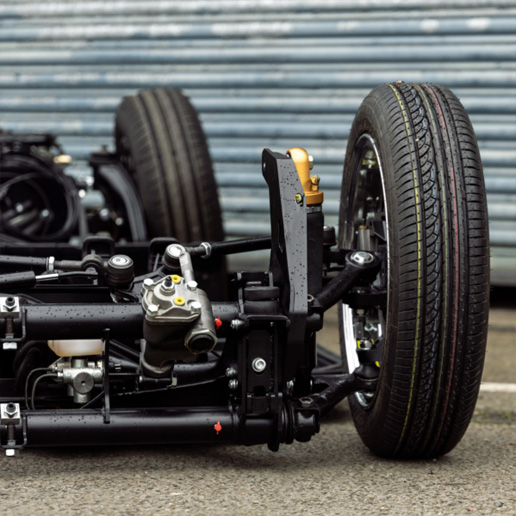
LIMEBUG CASTOR-ADJUSTABLE TYPE 3 CONVERSION BEAM
Type 3 drivability and ride with Type 1 components
Limebug Castor Adjustable Type 3 Beam
Lets start this seciton with a deep dive into the controversial world of type 3 conversion beams.
Why do any of this and change my Type 3 Beam?
The simplest word to start this module with is limitations.
The Type 3 platform albeit a step forward in luxury in terms of its principles presented a world of issues when it came to changing anything VW had already put out there. The type 3 front axle uses a floating beam within a rubber cushion to give a more luxurious feel. By this we mean predominantly soft ride with reduced noise within the cabin.
The trade off of this is where things get a bit controversial, while no-one can deny it made it softer, I think it may be up for debate whether softer was really needed, as stock Beetles / Ghias were far from hard in the first place.
The new platform brought forward some interesting ideas with crossed over torsions, a different style of ball joint, wider track, larger brakes etc.
However
You just can’t get a Stock type 3 very low, the structure of the front end uses indexed torsion bars to set the ride height, so you don’t have adjusters, the problem is with the width of a type 3 beam being fixed by these torsion bars, you cannot narrow the front end at all to fit tyres within the fenders as done with a Beetle.
The second downfall is there is really no way to make a dropped spindle without cutting and welding and therefore increasing the track width further. This also means that as the ride height is lowered the harshness increases with the trailing arm angle.


So how does a Type 1 conversion beam help this on a Type 3?
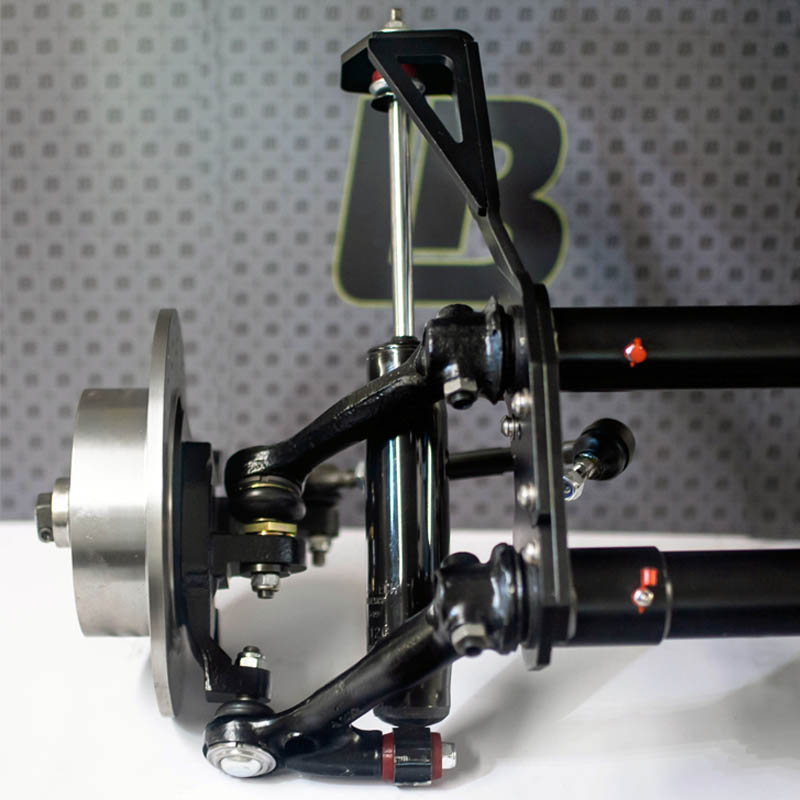
Critical to spec’ing your beam, with complications and benefits to both RHD and LHD configurations, its key we get this piece of information to spec such elements as tie rod length, pitman steering arm and suitable steering stop.
We can also assist you with best positions for steering box and damper mount once fitted, there are intereference points associated with certain aftermarket parts such as fuel tanks which require some specific adjustments in order to get maximum drivability from your new Fully Assembled Beam. But doesn’t this push my wheels back and make the front look weird? The answer would have used to be yes, the more DIY style beams use the main tubes and directly mount these to the frame head of a Type 3, this would push the wheels backward by around 20mm causing a range of issues with steering column position as well as looking odd We build in our unique castor adjuster into the beam here, whilst moving the axle tubes forward to marry up perfectly with Type 1 trailing arms, combined the wheel position in the arch is exactly as original Type 3.
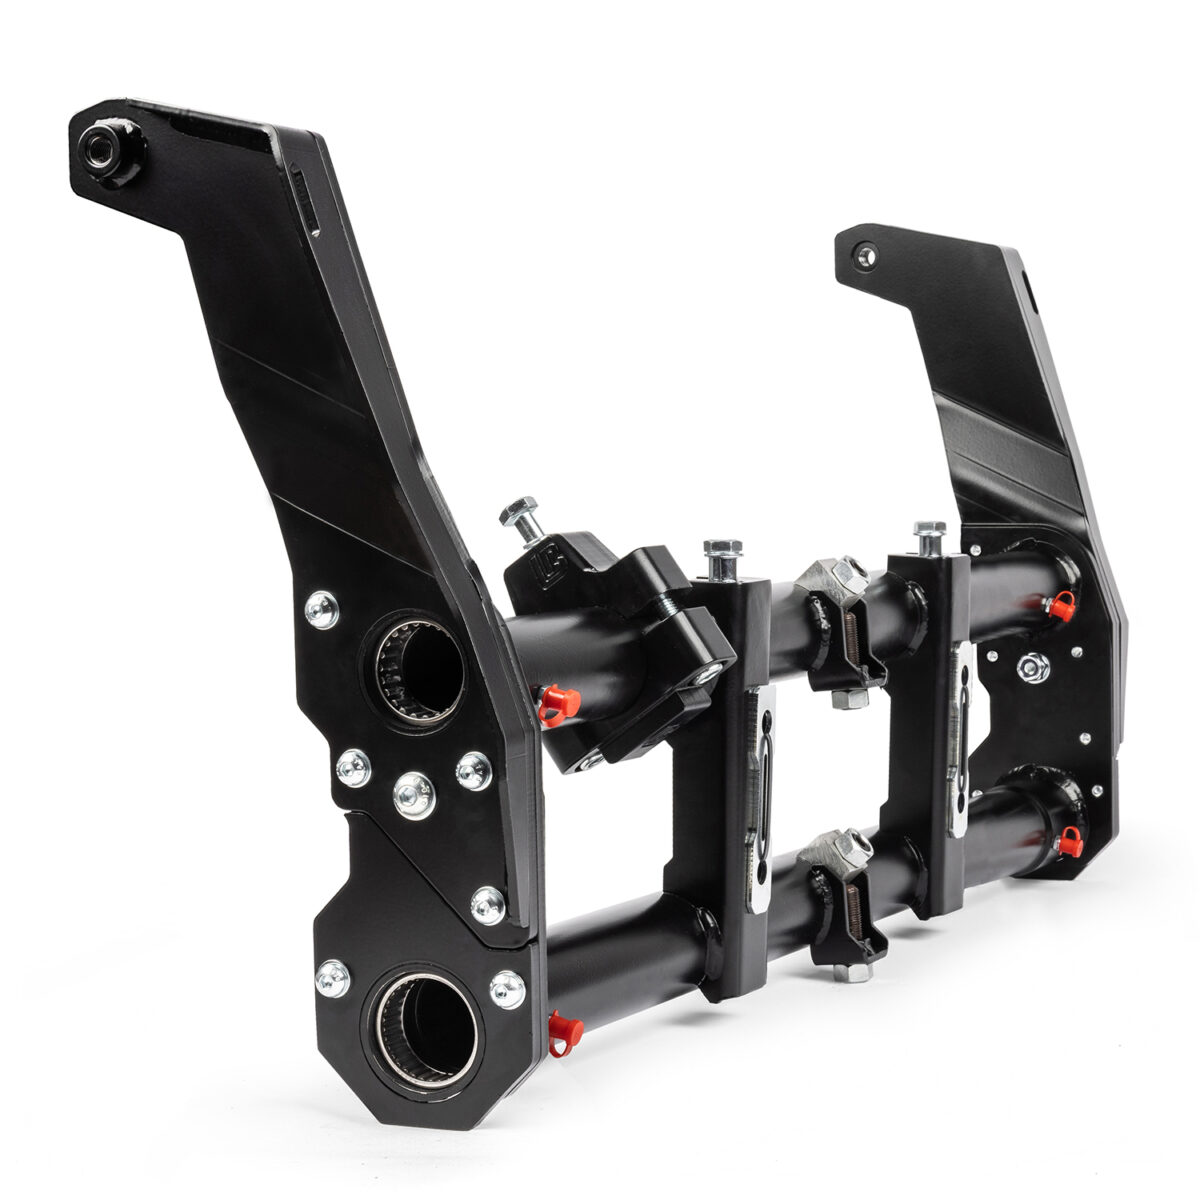
Castor Adjustable Section, Why does only your beam have this? and what does it benefit in terms of drivability?
The type 3 drivability as a metric we decided to play around with the extra room and features the type 3 beam gave us. This opened up a small gap for a unique idea we had been playing with for a number of years. The Castor Adjuster…
We are all familiar with the torsion leaf adjusters, but castor adjusters, why do that?
As standard all Aircooled VW Car models run a few degrees of positive castor, this helps self centre the wheels when cruising and prevents bump steer. Our castor adjustable beams mimic the factory angle almost exactly giving you and almost identical driving experince in the neutral settings
So why make it adjustable then?
The answer to this is simple, all old VW’s run with their front end higher than the rear as standard, and when nearly everybody lowers the vehicle typically the front receives a more excessive drop than the rear, this can be a combination of suspension and wheel/ tyre setup.
So we developed an adjustable castor system. This allows you to run stock, or slightly + or – the Original postion, typically more nose down more postive castor, the flatter the vehicle the more negative the castor. By having this additional calibration the owner can tune bump steer along with ball joint travel limits to give their type 3 the obsolute optimal ride quality, drivability and stance.


Setting up Limebug Type 3 beam, what is involved, how easy is it to fit?
Installation of your new Type 3 Narrowed Beam
- Step 1: To install your new Limebug beam you first need to remove the entire front axle from your Type 3. There are a total of 8 bolts securing the beam to the frame head, then remove the steering box to to give some additional clearance ready to install the new beam
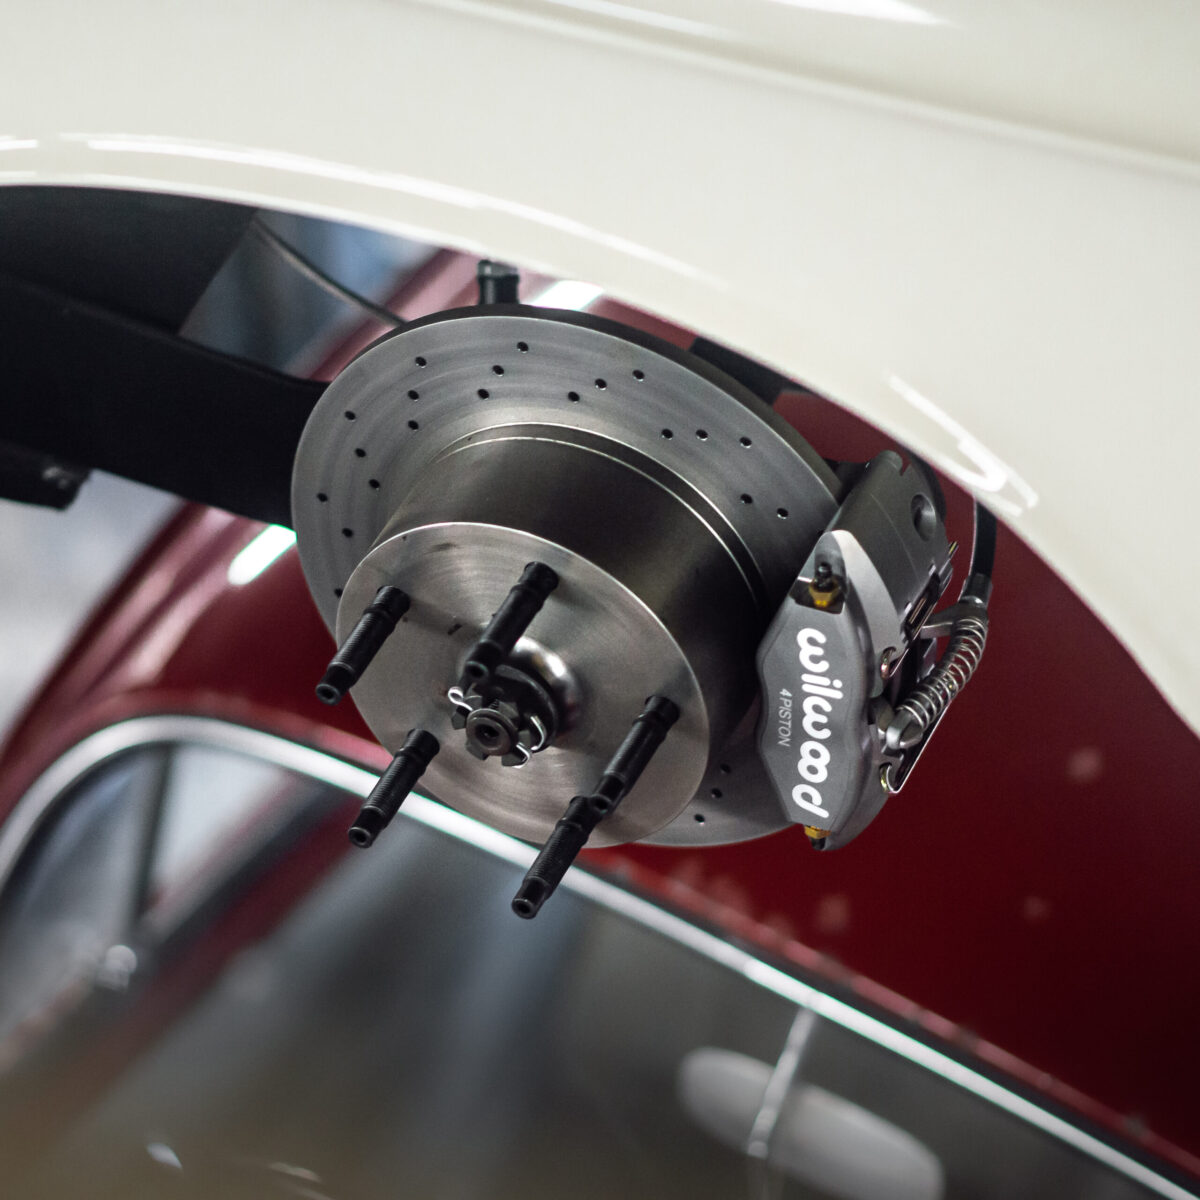
- .Step 2: Now it is worth noting you CAN re-use your original Type 3 disks, and in some cases Drums also. The only hiccup we have found is some Type 3 calipers have an additional casting on them that may need to be ground off in order to fit to Type 1 Spindles.
- Step 3: Prepare the lower sections of the frame head by either, cutting and welding the lower edges, or trimming and filling wiht a water resistant sealer if welding is not available.
- Step 4: Prepare all components (detailed below) ready to install your new beam to the chassis. Choose which castor angle best suits your desired look, note that the stock position the beam will be delivered in is neutral position. We recommend this as a good intial baseline setup, but note in order to adjust the castor angle at a later date the beam does need to be removed, reset and then re-installed.
- Step 5: Starting with the two horzontal fixing bolts, secure the beam in place loosely, noting that a large strong waser is best suited in replacement to teh square OE cap style washer that is being removed.
- Step 6: Refit the factory top rubber bung mount and the lower bung mount with the steel liner tube into the new conversion beam and secure the bolt.
- Step 7: Install the rocker block fixing bolt, (this is the allen headed bolt in the top of the beam). Tighten this first, followed by the vertical upright bolt followed by the main bolts.
- Step 8: Install the Shock Towers supplied with your beam (These are fitted at this point to prevent damaging the inner wings, note also the shock tower has a series of locating points, this works together with the castor adjustment unit to give maximum shock tower height at your desired setting, it also doubles as a bolt on setup for late type 3 models which have uneven inner wings. This allows the user to fof the beam with no cutting to the inner fender on any model year.
- Step 9: Install the trailing arms, spindles and brakes in the standard format, tip: apply a little grease to the trailing arms to assist with the initial installation.
- Step 10: Pack the beam with grease (Before installing the steering box) as this will make it easier to access the grease nipples.
- Step 11: Fit the steering box, favour the inside edge of the beam fractionally and fractionally faltter angle than stock for the steering box position to help aid with steering.
- Step 12: Set the track rods to a good base setting and give a little camber/ castor using the eccentic nut on the top ball joint to ensure the tramline effect does not occur.
- Step 13: Confirm the steering wheel angle is correct and make any minor adjustments if required, note if the vehicle has a horn using the factor earth, we recommend installing and additional early wire to the body from the steering box.
Your all set!, oh one last thing!
How to set the Castor Adjuster unit?
As stock the castor adjustment unit will be set to neutral position, however is you wish to castor, follow these steps:
- Increase Positive Castor Angle (Cal Look Style, Large Rear Tyre & Nose Down Style)
Remove the two Machine pins from the lower skid end on the upright of the beam (this is where the lower tube is), remove the two bolts entirely and with a rubber mallet tap the protruding edge on the front side of the beam until the lower section slides backward, aligning with the holes, then re-instate the machine pins and skid ends.
Next remove the 8x Allen headed bolts from the inner and outer sides of the shock tower uprights and rotate the unit so the front side drops down to its maximum limit, then refit all the bolts.
- Increase Negative Castor Angle (Air Ride Setups when running flat height body level overall, small rear tyres/ matched ride height, Baja Style with large Knobbly all round tyres, also increases maximum drop limit)
Remove the two Machine pins from the lower skid end on the upright of the beam (this is where the lower tube is), remove the two bolts entirely and with a rubber mallet tap the Rear Curved edge on the back side of the beam until the lower section slides forward, the outer front edge will protrude, watch through the side unil aligning with the holes, then re-instate the machine pins and skid ends.
Next remove the 8x Allen headed bolts from the inner and outer sides of the shock tower uprights and rotate the unit so the rear side drops down to its maximum limit, then refit all the bolts.
Type 3 Static Narrowed Beam
Type 1 Ball Joint Conversion Beam

Type 3 Air Ride Narrowed Beam
Type 1 Ball Joint Conversion Beam
Type 3 Conversion Fully Assembled Beams
Type 3 / Razor Edge

So I’ve decided I want Air / Static, what do I need now?
The donor parts you will need to acquire from a T1 Beetle or T14 Karmann Ghia are
- Trailing Arms 1966 Onwards (Ball Joint Style) We recommend acquring a set of arms with long travel ball joints installed, this ensures maxmimum travel range both for air and static applications.
- Spindles
Adding in most case a set of 2.5″ dropped spindles is required to complete the setup upto brakes.
We offer these in both drum or disk variates, to discuss your brake options contact a team member prior to purchase as some brake systems (even disk) require drum spindles and some brake kits are not compatible with dropped spindles.

Not forgetting these last items to complete the setup
- Torsion Leaves / Through Rods (Static or Air RIde Respectively) for Type 3
- Ball Joint Camber/ Castor Nut
- Ball Joint Camber/ Castor Nut Washers
- Track Rods to suit your Hand Drive, and use with or without an ultrarm
- Pitman arm (Type 1 style) or Limebug Ultrarm (Highly Recommend)
- Steering Damper (Type 1 Style)
- Trailing Arm Pinch Nut / Bolt Set
- Trailing arm End Caps (Recommended for Air Ride Type 1 Trailing Arms)
- Ball Joint Trailing Arm Grease Seals
- (Recommended) Limebug Bolt on Steering Stop
Problems with VW Type 3 Ground Clearance
All type 3’s have an achilles heel in the design of the front end. Be it Notchback, Squareback, Fastback, Variant or Razor Edge they are all limited by ground clearance limits.
Theses areas are:
- The Frame Head
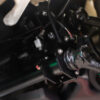
These are the two lowest sections on the frame head of the chassis. Easily recognisable with a single hole which originally would clamp the retaining plate to the rubber bungs around the factory type 3 beam.
This section is best to be trimmed and either welded or sealed depending on the tools available to the installer. There is a pinch point where the two skins come together which can be seen on the image to the right, this is the optimal way to modify your chassis in prepartion for your new Conversion beam and is the only cutting work required.
- The Wheel Well
This element is much easier to address. For some reason VW appear to have foreseen the future of their products may be getting some altitude adjustments and made the wheel well for all Type 3 and 34 models bolt in.
There is a couple of variations of these, but don’t worry we’ve got your covered with our full range of bolt-in “flat” wheel wells which maintain the watertight area under the hood of your cherished vehicle, but rid the issue of ground clearance from the equation.
Links found below to our Bolt in wheel well range for Type 3 and Type 34

1956-74 Type 3 Flat Bolt in Wheel Well
For Lowered Type 3’s

1956-74 Razor Edge Flat Bolt in Wheel Well
For lowered T34’s


So that thing about the Ultrarm, what is that?
The ultrarm Pitman arm is another concept product we created to help solve the steering lock, limit and rate changes which are a by product of narrowing the front axle. This has long been an issue with various add on parts semi-contending do dampen the issue but nothing has been fully engineered to rectify the situation entirely. The ultrarm was created, and has won rave reviews on all platforms including Type 3 as the go to solution for solving steering lock, rate and ackermann with 50% of the increase in speed when compared with a quick steer kit. This means:
- Hugely improved steering lock
- Steering rate resolved (wheels turn at the same rate both when turning left and right)
- Ackermann Angle Restored
- No “death steer” from over extension of the fixing points
- No drilling of any kind, straight fit and swap
- Single piece construction, meaning no loose link or failure to meet regulations such as TUV which quick steer will not pass.
- Manufactured in EN24 (Same material as driveshafts, and steering gear)
LHD Type 3 Ultrarm
RHD Type 3 Ultrarm
In Summary
We hope this helps you install your new Type 3 – Type 1 conversion beam on your Notchback, Fastback, Squareback, Razor Edge model, and remember we are only an email or phone call away.
We have included a parts list below which show each available component to twin with your Type 3 setup and the reasons to decide on whether to add them, again we would love to hear your feedback on the guide and anything in addition you would like us to add or give more detail on,
From everyone here, thankyou for your time and interest in our products!
The Limebug Team
YOUR CONVERSION BEAM ESSENTIAL ADDITONAL PARTS LIST
Type 3 conversion beam comprensive parts list
Type 1 Ball Joint Trailing Arms
Type 1 Refurbished Trailing Arms

Ball Joint Camber Nut Big Washer, Pair
1x Pair Washers

Type 1 Steering Damper
OEM Quality Damper

Trailing Arm Pinch Bolts / Nuts
Full Set (x4)

Ball Joint Trailing Arm Grease Seals
Full Set (x4)

Camber / Castor Nuts
Type 1 Castor / Camber Nuts

NEXT CHOOSE FROM EITHER
Spindle Selection (Based on brake setup)
2.5″ Dropped Spindles (Disk Brake)
Type 1 Spindles to Pair with Type 3 Conversion Beam

2.5″ Dropped Spindles (Drum Brake)
Type 1 Spindles to Pair with Type 3 Conversion Beam

CHOOSING THE CORRECT INTERNALS
Choose between Static and Air Ride Internals
Torsion Leaves (Narrowed for Type 3 Static Beam)
Torsion Leaves (1x Pair)

Through Rods (Narrowed for Type 3 Air Beam)
Through Rods (1x Pair)

ADDITIONAL PARTS FOR CONSIDERATION
Take your setup another notch
Bolt on Steering Stop
Allowing you to set steering lock limits

Ball Joint Trailing Arm End Caps
Perfect if running air ride to protect the trailing arms from dust and dirt ingress

Follow us on socials:
![]()
![]()